As a Salesforce admin, salesforce flows are one of the most effective tools in your toolbelt. When set up correctly, Salesforce flows help you in simplifying complex business processes. Otherwise, it can make a mess.
Let’s get a basic understanding of salesforce flow and how it works.
What’s Happening with Workflow Rules and Process Builders?
Salesforce recently announced the deprecation of Workflows and Process Builder in 2023, which means they would no longer receive product updates. This announcement means that Salesforce Flow builder will be the single source of business process automation without code. After 2023, we would not be able to create new process builders and workflows, but editing on the existing ones would be allowed. There is currently no end of life announcement for Process Builders and Workflows.
What is a Salesforce Flow Builder?
Salesforce Flow Builder is a declarative way to automate complex business processes. For example, flow builders can automate processes that need creating/updating unrelated records, querying multiple objects, or running loops on the data. Flow builders can also access external systems. Flows can be further extended by adding Apex actions.
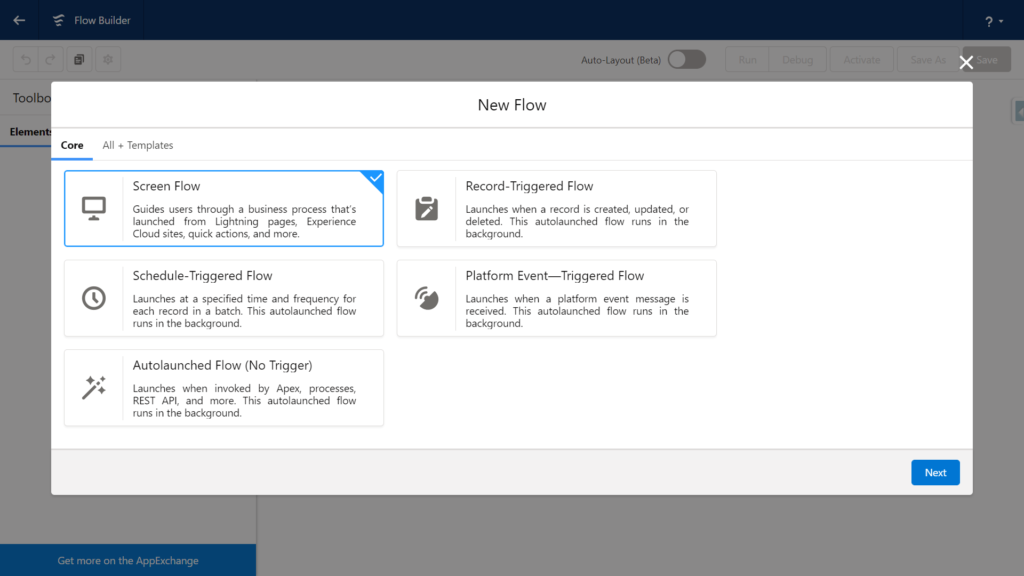
What are the Different Types of Flows?
- Screen Flow: It can be called using a button or an action or displayed in a Lightning Page or the Utility Bar. It appears as a screen for the user to interact with. Screen flow cannot be automatically triggered.
- Record Triggered Flow: It begins when a record is created or updated. Its functionality is similar to Process builder.
- Auto launch Flow: These can be called Apex, Process Builder, or another Flow. They can perform actions automatically behind the scenes.
- Scheduled Triggered Flow: It runs automatically on a recurring schedule. It is helpful for jobs performed frequently or on a schedule (once, daily, weekly).
- Platform event-triggered Flows: These are called when a platform event is received.
What are the Best Practices for Creating Flows?
Some of the best practices to be followed when creating flows are:
- Plan the Flow: Understand the business process that needs to be automated using the flow. Draw the step-wise details required; this will help determine what elements and actions the flow needs. It would also help to understand how or when the flow is initiated.
- Create and Test the Flow: Create and test the flow in the Sandbox or developer environment before production. Creating the flow directly into production creates a risk of creating/modifying or deleting data in production.
- Perform Data Manipulation: Flows run under Apex governor limits; it is wise to combine all the data manipulations (create, modify or delete) and perform them at the end of the flow.
- Do Not Hardcode Ids: Ids are org-specific and will cause an error in the Flow execution when deployed to other environments.
- Save the Flow Regularly When Creating: Flows are not saved automatically. In case of session time out or internet issues, one can lose the developed flow unless explicitly saved. So it is recommended to save progress regularly.
- Always Build an Error Handler: Include a fault path in the flow design to gracefully handle an error in the flow and show custom error messages.
- Test Possible Paths the Flow Can Take: In the case of complex flows, the flow can take multiple paths depending on the data and decisions configured. Make sure to test as many paths as possible.
- Ability to Navigate to the Previous Screen: Avoid giving users the functionality to move backward in the flow. This can cause the flow to make duplicate data changes in the database if not handled carefully.
What are the Major Limits of Using Flows?
Apex transaction limits govern flows. In case a flow exceeds a governor limit, the complete transaction is rolled back. The changes made by the transaction will be rolled back, even if there is a fault path defined. The limits of the larger transactions would govern the auto-launch flows initiated as part of a larger transaction.
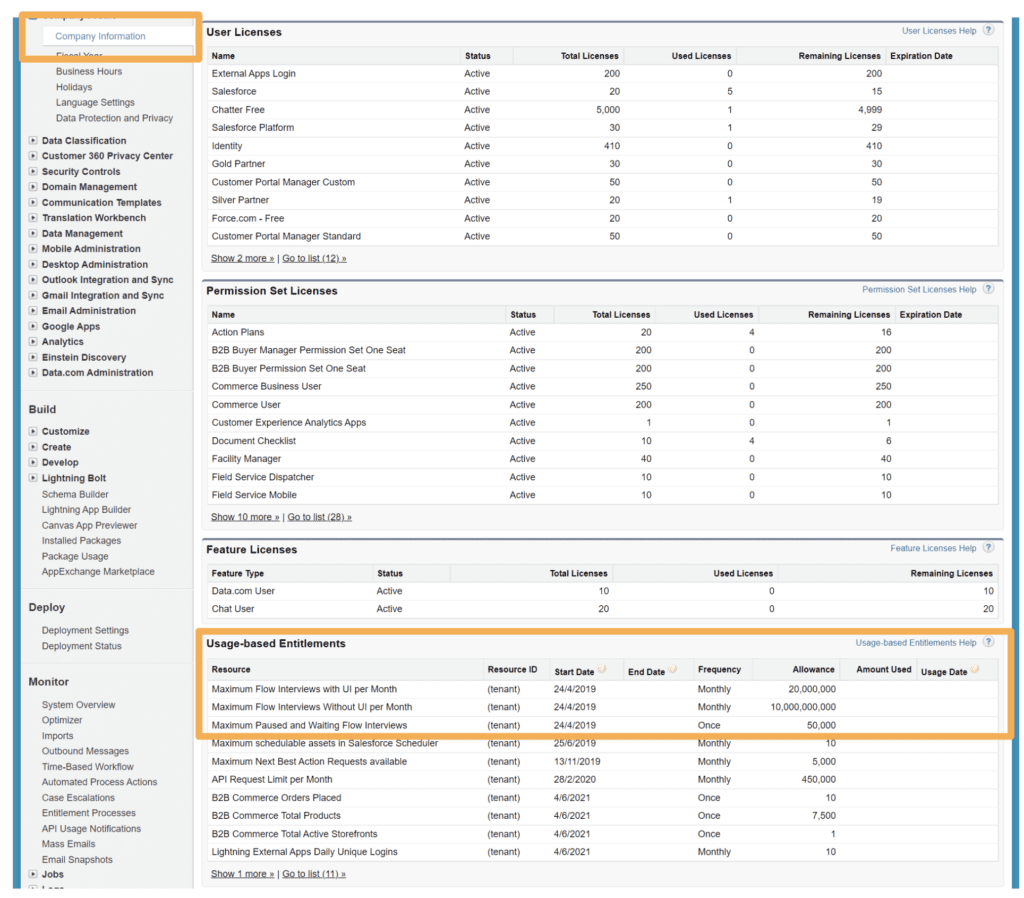
Flows have usage-based entitlements that determine how many flow interviews are allocated per month. The entitlement allocated for the org can be viewed in Setup -> Company Information.
What are Some of the Flow Considerations?
There are a few considerations to keep in mind when creating flows. A few are listed below:
- Flow can access data only if the running user has permission to access the fields.
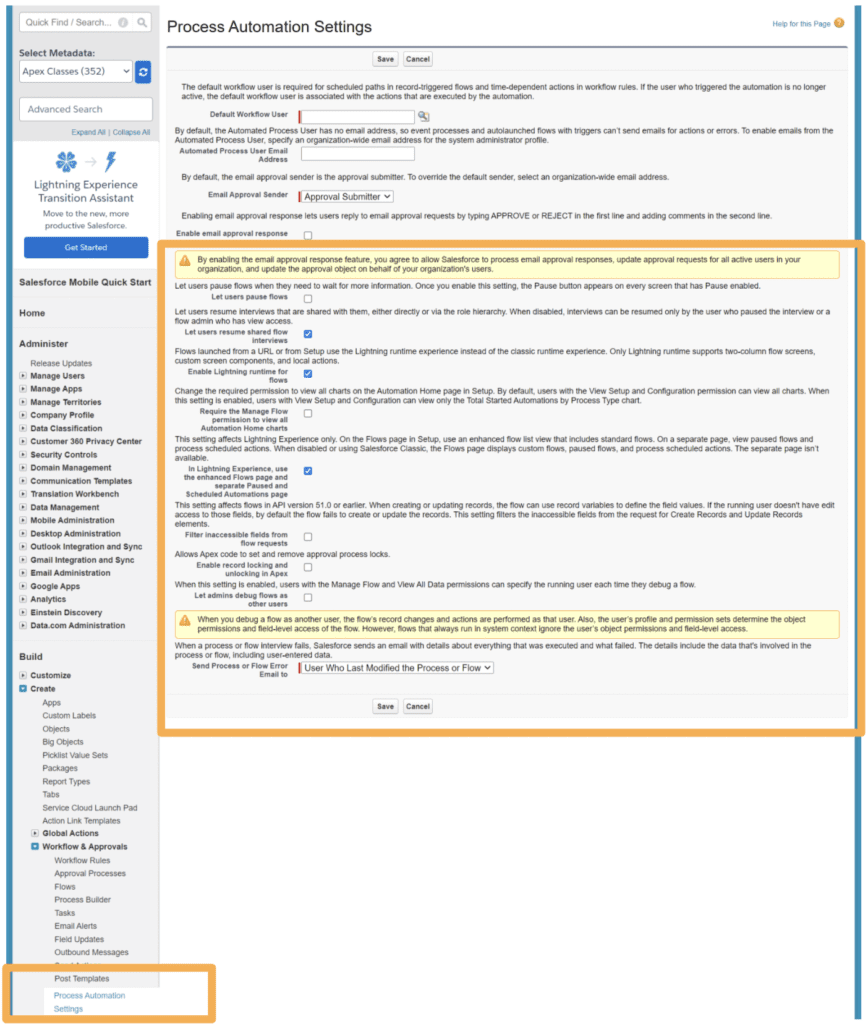
- In case Flow tries to update a field that is not editable by the user, flow fails. This scenario can be avoided by using the setting ‘Filter inaccessible fields.’ The setting can be found in Setup->Process Automation Setting.
- In a transaction when Salesforce creates, updates, or deletes data in the org and then attempts to access external data in the same transaction, an error occurs. A separate transaction is recommended to access data in external systems. In the flow, end the prior transaction by adding a Pause element or a Screen element.
- When a user session expires, in-progress flow interviews are interrupted and can’t be resumed. If the flow executed actions, such as record manipulations or Chatter posts, those actions aren’t rolled back. But any other progress through the flow, such as user data entered on the screen, is lost.
To read more about flow limits and considerations – Click here
What are Some of the Basic Flow Features?
Manager Tab
The manager tab displays the existing resources. Each resource represents a value that is referenced throughout the flow. Some of the resources are Variables, Collections, Constants, Formulas, or Choices.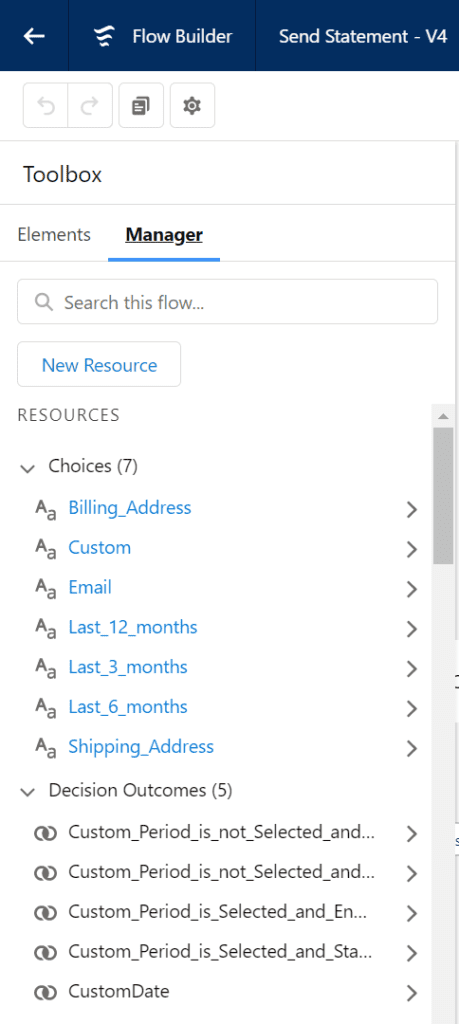
- Variable: Variables are used to store data to use in the flow. The variables can be of type Text, Number, Record, Dates, Currency, Boolean, Picklist, or Object record, to name a few.
- Collection: Collections are used to store a list of variables. They are used to process multiple records at a time.
- Constants: Constants are values you set once and never change. Constants are recommended when the flow needs to reference the same value multiple times.
- Formula: Formula is used to display a dynamic value depending on other values within the flow.
- Choices: Choices are used in Screen flows to show options to the user.
Elements Tab
Elements tab displays Interaction, logic, and data elements available for the flow. Each element is an action the flow can execute. New elements can be created from the Elements Tab.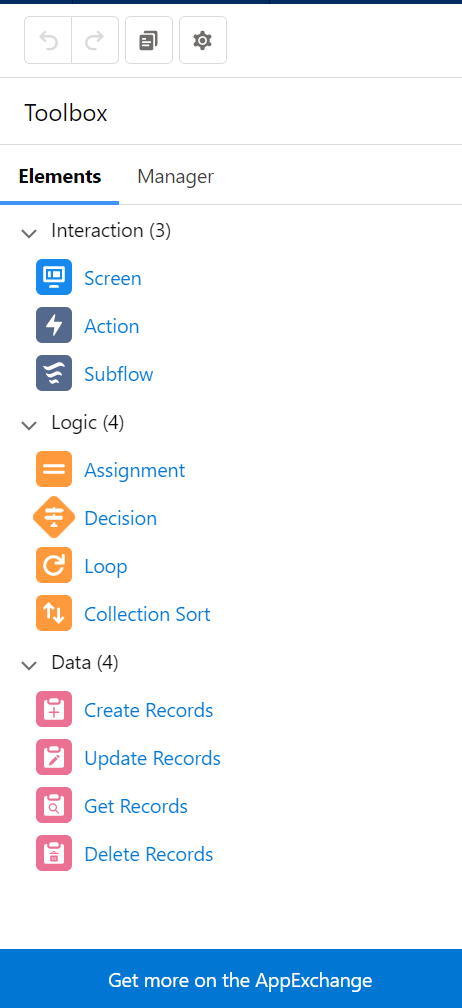
Interaction Elements
- Screen: Screen element / User interface for the flow. The screen can be used to display information or can be used to collect data from the user. This element is available only in Screen Flows.
- Actions: Actions are external actions that further extend the functionality of the flow. Some examples for actions – Apex, Send emails, etc.
- Subflow: A flow can initiate another flow.
Logic Elements
- Decisions: Decision split the flow depending on the data that’s being sent through the decision element.
- Assignments: Assignments give a value to a variable.
- Loops: Loops handle multiple variables at once using collections.
Data elements
Data elements allow the flows to fetch, create, update or delete records in the database. The elements include Get Record, Create Record, Update Record, and Delete Record. Get Record is used to fetch record/s from the database. Create Record, Update Record, and Delete Record are used to activate the data in the database.
Connectors
Connectors decide the available paths that a flow can take at run time. Various elements in the flow are connected using the connectors available. Some types of connectors are Unlabeled, Decision Outcome, Fault, Pause, For each, etc.
How to Troubleshoot the Flow?
Salesforce sends an error email every time a flow errors during the execution, in the user’s default language who ran the flow. Flow error emails include the data that’s involved in the process or flow, including user-entered data. It gives step-wise information that was executed till the point of error.
A basic understanding of the Salesforce Flows provides the foundation for its further studies. We would love to help you to upgrade your knowledge about the recent developments in Salesforce. Sign Up Now!